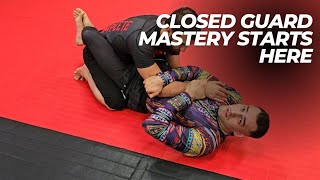
Foundation: Breaking Posture in Closed Guard
The primary obstacle when attacking from closed guard is an opponent maintaining an upright posture. The instructor demonstrates that pulling the knees to the chest while crunching creates an off-balance motion that forces the opponent forward. Understanding posture breakdown is essential before attempting any submission technique.
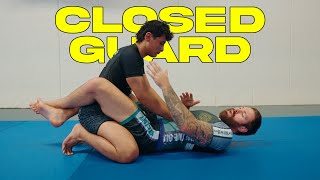
Recognizing Four Frame Positions
Opponents will respond to posture breaks by establishing one of four hand positions: both hands on the floor, both hands on the hips, one hand high and one low, or both hands high. Developing a specific response to each frame variation ensures the practitioner can systematically trap the opponent and create submission opportunities.
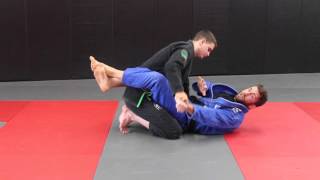
Both Hands on Hips: Lapel Control to Triangle Setup
When the opponent places both hands on the hips for support, the instructor grabs both lapels and executes the crunch motion to collapse the frame. As the opponent's hands lose stability, the instructor immediately secures the tricep, shrimps to establish arm isolation, and sets up the triangle by blocking the bicep and securing the leg position across the neck.
Finishing the Triangle: Leverage and Positioning
Once the triangle is locked, the instructor bridges the hips and pushes the arm across the body to prevent posturing. Proper leg placement is critical—opening the guard slightly allows the neck to seat deeper against the thigh. The submission is completed using leg pressure alone while controlling the head.
Countering Tight Arm Defense with Forearm Control
When the opponent secures a tight grip and brings the arm close to the body, direct pushing becomes ineffective. The instructor transitions to the elbow, pummels with the forearm on the inside, and uses grinding pressure to maintain control. This position eventually leads to wrist control and escape opportunities.
One High, One Low Frame: Sleeve Grip and Drag
Against an opponent with asymmetrical hand placement, the initial crunch lacks effectiveness due to superior framing. The instructor establishes an across-sleeve grip, pummels underneath, and uses wrist pressure to break the frame. The arm is then dragged across the body while controlling the tricep to trap the limb and threaten back control or sweeps.
Pendulum Sweep from Arm Drag Position
If the opponent turns their body weight back toward the instructor after the arm drag, the legs are thrown high to rock the opponent upward into mount position. This pendulum sweep is a natural progression when the opponent resists the back control threat.
Hip Control Defense: Collar Choke Application
When the opponent grips the hip tightly and prevents back control, the instructor transitions to a collar choke from closed guard position. This direct choke is executed by reaching around with one hand while maintaining the closed guard, then falling backward to apply pressure.
Both Hands High: Pummel and Collar Grip Sequence
Against both hands positioned high, the instructor creates space by pushing the biceps, then rapidly pummels the arm underneath to secure a collar grip. The right elbow pins against the chest, preventing the opponent from repummeling, while the left hand cinches the grip higher behind the neck for maximum choking pressure.
Transitioning to Armbar from Collar Choke Threat
As the opponent defends the collar choke by sitting their forearm on the chest, the instructor uses the hand behind the elbow to bridge and bring the elbow toward the belly button. The guard is then re-closed with one leg over the shoulder, knee pressure controls posture without arm involvement, and the practitioner can seamlessly transition to the armbar submission.
Easy to Use Entire Closed Guard System
Key Takeaways
- •Foundation: Breaking Posture in Closed Guard
- •Recognizing Four Frame Positions
- •Both Hands on Hips: Lapel Control to Triangle Setup
- •Finishing the Triangle: Leverage and Positioning
This video I go through in my opinion the most simple and effective closed guard system you can use. Often in BJJ new students are taught techniques but they are not shown how they go together. This video I show an entire system that deals with every main response your opponent can have. Hope you like the video. More content on my website here: https://www.jonthomasbjj.com/collections Kimonos: https://vitalkimonos.eu/
Related Techniques
Frequently Asked Questions
What does this video teach about low closed guard?
This video covers foundation: breaking posture in closed guard, recognizing four frame positions, both hands on hips: lapel control to triangle setup. It provides detailed instruction from JonThomasBJJ.
How long does it take to learn low closed guard?
The basic mechanics can be understood in a single session, but developing reliable execution requires consistent drilling over weeks of practice. This 10-part breakdown helps structure your training by isolating each phase of the technique.
What are the key details for finishing low closed guard?
Against both hands positioned high, the instructor creates space by pushing the biceps, then rapidly pummels the arm underneath to secure a collar grip. The right elbow pins against the chest, preventing the opponent from repummeling, while the left hand cinches the grip higher behind the neck for maximum choking pressure.
Related videos
Kimura From Closed Guard For White Belts (Small Details To Improve Success)
Chewjitsu
Elevated Basics: The Ultimate No-Gi Closed Guard Guide
IsakIvanovicjj
How to do the Guillotine in Jiu Jitsu | Everything You Need to Know!
Matt Arroyo Jiu Jitsu
Elevated Basics: The Ultimate No-Gi Closed Guard Guide
IsakIvanovicjj
How to Create Angles in Closed Guard Like Gordon Ryan
Gordon Ryan