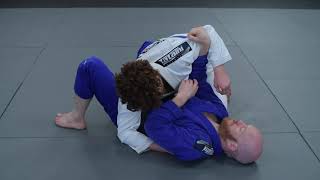
Initial Setup and Tight Waist Control
The defender establishes a tight waist grip, then transfers control by grabbing the opponent's back with a full wrap. Securing the opponent's arm is emphasized as the critical first step before proceeding with the defense.
Arm Lock and Crossface Frame
The defender locks the opponent's elbow while positioning their arm across the opponent's face in a tight crossface. The free hand is placed between the opponent's legs to control the lower body.
Transitioning the Leg Position
The defender drives the opponent's head toward their knee, using leg pressure to control the upper body. The grip is maintained by clasping the defender's own wrist while keeping tension through the legs.
Wrist Lock and Hand Positioning
The defender secures their grip by holding their own wrist, avoiding reliance on upper body strength alone. The defending hand positioned between the legs applies constant pressure without allowing movement.
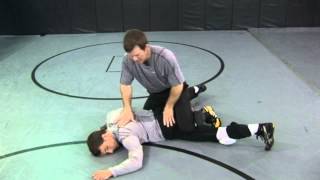
Final Cradle Position and Pressure Points
The defender straddles the opponent's legs with their bottom leg targeting the ribs and top leg targeting the temple. Consistent squeezing through the wrist and neck completes the cradle, with the opponent's leg shake indicating submission pressure.
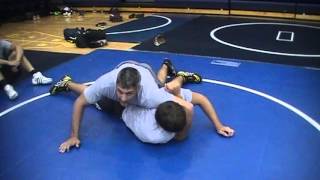
Hip Position and Partner Cooperation
The defender's near hip must remain flat on the mat for proper execution; raising it forces excessive back pressure on the opponent. Training partners should cooperate by allowing natural body positioning to prevent injury and enable proper drilling.
Complete Sequence Breakdown
The technique combines tight waist control, elbow lock, crossface frame, leg drive to the knee, wrist grip, and leg straddle positioning. The final phase involves head placement on the mat with coordinated pressure from both legs and the wrist lock for submission.
Weight Distribution and Hand Stability
Placing significant weight on the hand positioned between the opponent's legs keeps it stable and prevents it from shifting. The other hand must remain mobile to secure the wrist grip while the weighted hand maintains positional control.
Cradle- Crossface 1/2
Key Takeaways
- •Initial Setup and Tight Waist Control
- •Arm Lock and Crossface Frame
- •Transitioning the Leg Position
- •Wrist Lock and Hand Positioning
Cradle basics
Frequently Asked Questions
What does this video teach about standard crossface defence?
This video covers initial setup and tight waist control, arm lock and crossface frame, transitioning the leg position. It provides detailed instruction from Will Terrell.
How long does it take to learn standard crossface defence?
The basic mechanics can be understood in a single session, but developing reliable execution requires consistent drilling over weeks of practice. This 8-part breakdown helps structure your training by isolating each phase of the technique.
What are the key details for finishing standard crossface defence?
The technique combines tight waist control, elbow lock, crossface frame, leg drive to the knee, wrist grip, and leg straddle positioning. The final phase involves head placement on the mat with coordinated pressure from both legs and the wrist lock for submission.