Introduction and Equipment Overview
James Cain demonstrates three bo-shuriken variants: a construction nail with the head removed, a lag bolt with both ends cut and sharpened, and a piece of rebar with a flat striking surface. Each projectile offers different handling characteristics and grip positions suited to the thrower's preference and the weapon's geometry.
Grip Techniques for Different Variants
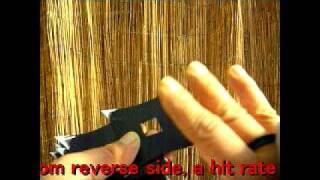
The construction nail is held with a pinching grip using the thumb. The lag bolt employs a cupped hand position with the palm wrapping around the body. The rebar variant uses the index finger positioned on the flat surface, allowing for more precise control during the throw.
Weight Distribution and Finger Placement
The thrower positions fingers just above the weapon's center of mass, which typically sits at the halfway point along the shaft. This placement ensures the push point occurs slightly below the grip, generating optimal rotational and ballistic characteristics upon release.
Trajectory and Flight Mechanics
Bo-shuriken do not fly in a straight path like darts but instead follow an arcing trajectory, rising initially before descending toward the target. Understanding this parabolic flight pattern is essential for effective long-distance throws, requiring the thrower to aim higher than the intended impact point.
Arm Motion and Release Point
The throwing motion involves a fluid arm extension with the release occurring at a specific point in the trajectory. Slow-motion video analysis helps practitioners visualize the exact mechanics of arm movement and the timing of finger extension relative to the body's position.
Progressive Training Methodology
Beginners should start at close range and progressively increase distance as proficiency develops. Self-recording practice sessions enables practitioners to identify mechanical errors and refine technique through visual feedback.
Target Selection for Practice
Novice throwers should use soft, yielding materials such as cardboard boxes or styrofoam to maximize successful penetration and maintain training motivation. As throwing power and accuracy improve, practitioners can progress to harder, denser targets.
Bo Shuriken tutorial
Key Takeaways
- •Introduction and Equipment Overview
- •Grip Techniques for Different Variants
- •Weight Distribution and Finger Placement
- •Trajectory and Flight Mechanics
Learn how to throw a bo shuriken
Related Techniques
Frequently Asked Questions
What does this video teach about bo-shuriken — spike?
This video covers introduction and equipment overview, grip techniques for different variants, weight distribution and finger placement. It provides detailed instruction from James Kane.
How long does it take to learn bo-shuriken — spike?
The basic mechanics can be understood in a single session, but developing reliable execution requires consistent drilling over weeks of practice. This 7-part breakdown helps structure your training by isolating each phase of the technique.
What are the key details for finishing bo-shuriken — spike?
Beginners should start at close range and progressively increase distance as proficiency develops. Self-recording practice sessions enables practitioners to identify mechanical errors and refine technique through visual feedback.
Related videos
5 WAYS to Throw NINJA Star (Shuriken Tutorial)
Adam Celadin

How to throw Shuriken"Part-10 Three Shurikens simultaneously
HouzanSuzuki
How to throw Hira-Shuriken(Star-type)
Houzan01Shuriken
Learning to Throw Shuriken with no Experience
SkilLeo
HOW TO THROW NINJA STAR SHURIKEN UNDERHAND E2 SECOND TECHNIQUE
PRIDE MARTIAL ARTS