Yoko Okori vs. Ukiwaza: Tactical Differences
Yoko Okori differs from Ukiwaza in its tactical requirements and risk profile. While Ukiwaza allows the thrower to maintain leg positioning if the technique fails, Yoko Okori commits the entire body to the throw, leaving no recovery option if balance is not properly broken.
Body Rotation and Commitment
Both techniques require circular movement and body commitment, but Yoko Okori demands even greater rotational intensity. The thrower must generate a tight, controlled rotation similar to a crocodile's death roll, projecting the chest downward into the ground to generate throwing power.
Foot Positioning and Cross-Step
The technique begins with a cross-step and pull motion, positioning the feet in osogobari territory or the opposite foot. The thrower's shoulder should not remain directly in front of the opponent but should angle away, creating proper rotational alignment.
Gap Closure and Leg Engagement
Rather than simply closing distance, the thrower circles into the opponent's space while maintaining tight contact with the opponent's leg. The goal is to target the opponent's toes with the stepping leg while maintaining continuous circular pressure.
Balance Breaking as Critical Requirement
Unlike Ukiwaza, where incomplete execution still leaves the thrower with tactical options, Yoko Okori places the thrower in a vulnerable position near completion. Therefore, breaking the opponent's balance must occur reliably before committing fully to the throw.
Shoulder and Hip Alignment
Proper alignment requires the shoulders to be positioned away from the feet, not in the same vertical line. This angular positioning between the upper and lower body maximizes rotational effectiveness during the throwing motion.
Pulling Motion and Finish Execution
The initial action differs from Ukiwaza through a more lateral pulling motion that separates the opponent's knee. While the finishing arm motion resembles Ukiwaza, Yoko Okori incorporates a slight rotational turn at completion to fully project the opponent.
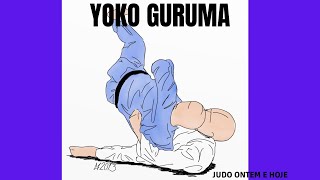
Yoko Wakare • 横分
Key Takeaways
- •Yoko Okori vs. Ukiwaza: Tactical Differences
- •Body Rotation and Commitment
- •Foot Positioning and Cross-Step
- •Gap Closure and Leg Engagement
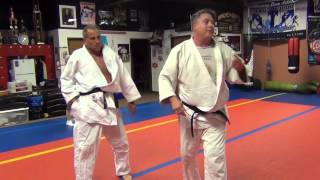
As a follow up to the uki-waza segment (last two videos) the class now shifted to a discussion on the formal execution of Yoko Wakare or side separation. Rego sensei emphasizes the need for a deep commitment to the idea of sutemi (sacrifice) in this technique, even by the sutemi-waza standards - especially due to the body orientation one is left in if the throw fails. Additionally, the need to rotate not only the uke (training partner receiving the technique) but the torso of the Tori (partner executing the technique). This was from the March 2021 Jukido Jujitsu black belt class in Palm Coast, Florida.
Related Techniques
Frequently Asked Questions
What does this video teach about yoko wakare?
This video covers yoko okori vs. ukiwaza: tactical differences, body rotation and commitment, foot positioning and cross-step. It provides detailed instruction from Jukido Academy.
How long does it take to learn yoko wakare?
The basic mechanics can be understood in a single session, but developing reliable execution requires consistent drilling over weeks of practice. This 7-part breakdown helps structure your training by isolating each phase of the technique.
What are the key details for finishing yoko wakare?
Proper alignment requires the shoulders to be positioned away from the feet, not in the same vertical line. This angular positioning between the upper and lower body maximizes rotational effectiveness during the throwing motion.
![[한판TV] 모로돌리기(Yoko-guruma) ; 허리껴치기 콤비네이션 기술](https://img.youtube.com/vi/kIGMK9oxFtw/mqdefault.jpg)