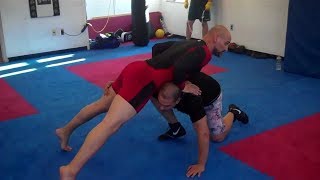
Sprawl Control Foundation
From sprawl control, the instructor establishes a seat belt grip with one arm while controlling the opponent's wrist with the opposite hand. The supporting knee is driven tight into the opponent's armpit, preventing arm movement and creating a locked position.
Crucifix Positioning
The instructor transitions into crucifix control by scooping the opponent's arm while maintaining wrist control. Critical positioning requires keeping the opponent's arm above the knee; if the arm slips behind the knee, the technique is compromised.
Submission Options from Crucifix
From crucifix position, the instructor can attack multiple submissions including a neck choke using the seat belt grip. The position also allows for choke application by driving hooks into the opponent's hips.
Elbow Push Escape Setup
When the opponent achieves side control, the defender must immediately control the bicep and shoulder to prevent mounting pressure. Hand placement is critical—the defender positions hands to intercept the opponent's pressing arm.
Extension and Drive Escape
As the opponent presses with their arm, the defender fully extends the limb outward before driving their hips upward. Complete arm extension is essential; a bent arm allows the opponent to maintain control and continue advancing.
Weight Distribution Counter
When the opponent reduces pressure and lifts slightly, the defender must immediately shift into an aggressive counter by turning into the opponent and loading maximum body weight. This prevents the opponent from settling into side control.
Turn and Elevate Defense
The defender turns sharply into the opponent while driving the knee up and pushing the opponent away in a single explosive movement. Quick timing is essential; hesitation allows the opponent to establish solid control.
Guard Recovery Variations
If full extension is limited by flexibility, the defender can pull guard without elevating the foot, though pushing the opponent away is the preferred outcome. Both variations reset the position favorably for the defender.
Modesto Grappling Club Instructional #50: Sprawl Control to Crucifix to Mata-Leo; Elbow Push Escape
Key Takeaways
- •Sprawl Control Foundation
- •Crucifix Positioning
- •Submission Options from Crucifix
- •Elbow Push Escape Setup
Modesto Grappling Club Instructional #50: Sprawl Control to Crucifix to Mata-Leo
Frequently Asked Questions
What does this video teach about standard quarter sprawl?
This video covers sprawl control foundation, crucifix positioning, submission options from crucifix. It provides detailed instruction from Modesto Judo Club.
How long does it take to learn standard quarter sprawl?
The basic mechanics can be understood in a single session, but developing reliable execution requires consistent drilling over weeks of practice. This 8-part breakdown helps structure your training by isolating each phase of the technique.
What are the key details for finishing standard quarter sprawl?
The defender turns sharply into the opponent while driving the knee up and pushing the opponent away in a single explosive movement. Quick timing is essential; hesitation allows the opponent to establish solid control.
Related videos
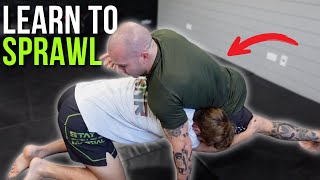
Sprawl: How To Not Get Taken Down In A Fight
Stay Safe Martial Arts
Modesto Grappling Club Instr. #117: Quarter Nelson From Sprawl Control
Modesto Judo Club
Leg Defense - Beating Power Half Hip Heist
CMPTV
Hip Over and Sprawl Back by Zoheir El Ouarraqe
FANATIC WRESTLING
How to : Wrestling and Grappling sprawl 101
Samir Seif