Instructor Introduction
Jason Sago, a third-degree black belt in jiu-jitsu and former UFC fighter, presents three essential no-gi takedowns designed for beginner BJJ practitioners. These techniques form a foundational toolkit for controlling opponents and transitioning to dominant positions.
Chest Pressure Takedown: Setup and Control
The chest pressure takedown begins with establishing inside control through a collar tie grip, with the opposite hand controlling either the bicep or tricep. To prevent the opponent from maintaining distance and framing, the instructor applies circular pressure to force a step, positioning the leg for the shot.
Chest Pressure Takedown: Execution and Transition
The shooter drops their weight with a straight back while connecting the chest to the opponent's leg. Using the posted leg for drive and elevation, the attacker applies downward spiral pressure by circling the feet with bent knees. Immediately after the takedown, transition into a pass by connecting both hands to the legs and hips, then slide into side control with a cross-face and underhook.
Snap Down: Upper Body Control and Head Positioning
The snap down is executed when an opponent drives forward, using a collar tie and crown grip to break balance. The instructor must position their shoulder in the opponent's neck pocket and squeeze both elbows tightly inward, preventing the head from popping out and denying the opponent any posturing opportunity.
Snap Down: Arm Control and Completion
After establishing head control, the shooter grips deep around the opponent's armpit with the middle and ring fingers and snaps downward simultaneously while sprawling and pulling. A controlled step around the opponent prevents leg capture and potential reversal, with the knee positioned behind the opponent to cut off corner escapes.
Snap Down: Finishing the Position
Once the opponent is controlled after the snap down, the shooter takes a large step around before immediately circling to avoid being snagged. With the elbow controlled and the knee positioned securely, the shooter can transition into a rear-naked choke setup and secure the finish.
Hip Throw: Grip and Hip Positioning
The hip throw begins with inside control—gripping the wrist or elbow with one hand while securing an underhook with the other. The shooter slides their hips completely in front of the opponent, aligning feet in the same direction and loading the opponent onto the hips through upper body grip pressure.
Hip Throw: Elevation and Rotation
With the opponent loaded on the hips, the shooter bends their knees and extends explosively, lifting the opponent's legs off the ground. A complete core rotation while looking behind completes the hip throw, leaving the opponent vulnerable on their back.
Hip Throw to Armbar: Control and Transition
After a successful hip throw, the opponent's arm becomes an immediate target. The shooter controls this arm with both hands, steps the shin into the opponent's armpit, and applies light pressure before transitioning into an armbar position.
Hip Throw to Armbar: Finishing Position
To complete the armbar, the shooter maintains close hip positioning to keep the opponent's elbow directly on top of the hips. With heels down and hips elevated, the shooter squeezes the knees together to finish the submission.
3 No-Gi Takedowns for Beginner BJJ
Key Takeaways
- •Instructor Introduction
- •Chest Pressure Takedown: Setup and Control
- •Chest Pressure Takedown: Execution and Transition
- •Snap Down: Upper Body Control and Head Positioning
FREE BJJ COURSE: www.peimma.com/freebjj FREE MMA COURSE: www.peimma.com/freemma -------------------------------- Please Like, Share and Follow :) https://www.instagram.com/jasonsaggo/ https://www.linkedin.com/in/jasonsaggo/ http://www.facebook.com/Jasonsaggo http://www.tiktok.com/@jasonsaggo https://www.twitter.com/jasonsaggo http://www.jasonsaggo.com Skool - Start your own community - https://www.skool.com/refer?ref=8eb822b61c3945728a09ef88b1c4de0d
Frequently Asked Questions
What does this video teach about beat down position?
This video covers instructor introduction, chest pressure takedown: setup and control, chest pressure takedown: execution and transition. It provides detailed instruction from Teaching you BJJ, MMA & Self-Defense.
How long does it take to learn beat down position?
The basic mechanics can be understood in a single session, but developing reliable execution requires consistent drilling over weeks of practice. This 10-part breakdown helps structure your training by isolating each phase of the technique.
What are the key details for finishing beat down position?
After a successful hip throw, the opponent's arm becomes an immediate target. The shooter controls this arm with both hands, steps the shin into the opponent's armpit, and applies light pressure before transitioning into an armbar position.
Related videos
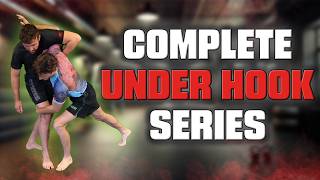
Learn to Underhook Like a Wrestler | Wrestling for BJJ
Wrestling University - Takedowns for Jiu Jitsu
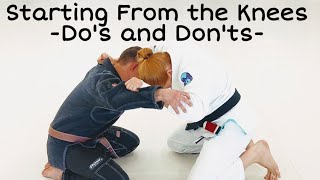
Starting From the Knees - Do's and Don'ts - Leviathan Brazilian Jiu-Jitsu Chattanooga
Still Rolling

5 Fundamental Side Control Positions in BJJ You Should Know
Chewjitsu
CONCEPTS in escaping side control
JeanJacquesMachado