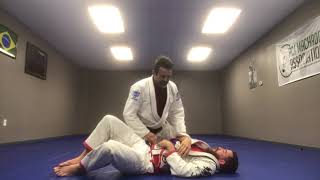
Establishing the Mount Position
From mount control, the instructor secures a cross-face grip by positioning the thumb inside the opponent's collar. The elbow is driven tight against the chest to prevent the opponent from creating space or escaping underneath.
Hand Placement and Control
The grip hand is positioned with the thumb inserted into the collar, with the elbow locked down firmly. The hand should be drawn as close to the neck as possible while keeping the elbow pinned to the opponent's center chest to maximize control.
Weight Distribution and Positioning
The instructor maintains a low center of gravity with knees spread wide to prevent being rolled. Weight is distributed to the side opposite the anticipated direction of escape, allowing for mobility while maintaining dominant position.
Transitioning to the Attack
From the established control, the instructor uses elbow pressure to manipulate the opponent's head position. Material is caught and the body drops low to begin the finishing sequence.
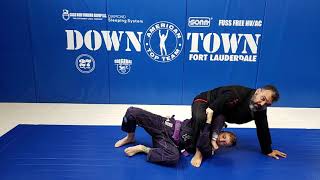
The Double Elbow Compression Finish
Both elbows are pulled backward simultaneously, eliminating space between the hands around the opponent's neck and arm. This creates intense compressive pressure rather than simply pinching a single limb.
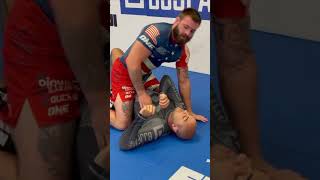
Responding to Elbow Defense
When the opponent's elbow rises in response to the compression, the instructor follows the movement upward by inserting the knee and hip. This maintains control while driving the arm further into submission position.
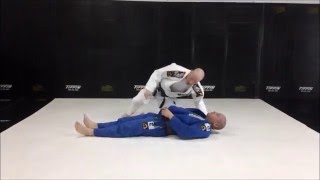
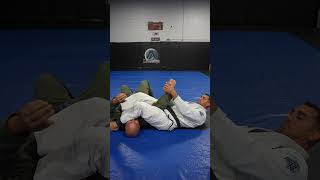
Capturing and Finishing the Armbar
The free leg crosses over the opponent's body as the trapped arm is secured with the elbow. The submission is completed by driving the hips upward while controlling the arm across the body.
Alternative Finish from Collar Control
If the primary finish is unsuccessful, the instructor can reverse position and work from the opposite collar grip. This maintains control and provides an alternative finishing angle for the submission.
DOUBLE THREAT from the MOUNT!
Key Takeaways
- •Establishing the Mount Position
- •Hand Placement and Control
- •Weight Distribution and Positioning
- •Transitioning to the Attack
Get in touch :-) www.satoribjj.com www.facebook.com/Satori.BJJ.Dublin/ www.instagram.com/satoribjj [email protected] Tel : 0831523568 We're a club in Dublin 15, Ireland Dedicated to being a resource to the local community and providing the best Brazilian Jiu-Jitsu learning enviroment we can, plus a support network for those that may wish to compete. See you on the mats :-)
Frequently Asked Questions
What does this video teach about double attack mount?
This video covers establishing the mount position, hand placement and control, weight distribution and positioning. It provides detailed instruction from Satori BJJ.
How long does it take to learn double attack mount?
The basic mechanics can be understood in a single session, but developing reliable execution requires consistent drilling over weeks of practice. This 8-part breakdown helps structure your training by isolating each phase of the technique.
What are the key details for finishing double attack mount?
The free leg crosses over the opponent's body as the trapped arm is secured with the elbow. The submission is completed by driving the hips upward while controlling the arm across the body.
Related videos
Double Attack from Mount
Gracie NEPA
Double Attack from Mount: Bow & Arrow or Armbar
ATHLAS TRAINING TEAM
Jiu Jitsu Techniques - Double attack from the mount and scape
Ricardo Cavalcanti BJJ
Great Options From Mount Position by Gordon Ryan
Bernardo Faria BJJ Fanatics
7 submissions from the mount! #jiujitsu #jiujitsutips
Matt Arroyo Jiu Jitsu