Arm Positioning from Mount
When trapped in mount position, the defender must keep their elbows and arms close to their body at all times. Opening the elbows allows the top player to climb the mount and establish a stronger position. Maintaining a tight frame prevents the opponent from advancing to the neck and upper body.
Head Position and Neck Safety
The defender's head must remain down and on the mat to avoid neck attacks and submissions. Lifting the head off the mat exposes the neck to chokes and creates unnecessary strain on the cervical spine. Keeping the head grounded also enables proper framing against collar and arm attacks.
The Bridge Setup
To execute the bridge escape, the defender slightly tilts their head toward the opposite shoulder, creating space over that shoulder. The hips are then driven upward while keeping the arms close to the body and maintaining upper back contact with the mat. This creates the necessary angle to dislodge the opponent.
Hip Escape with Leg Defense
Once the bridge is established with hips elevated, the defender turns toward their chosen escape direction without lowering their hips back to the mat. The top leg's knee is bent, and the hand is placed on the opponent's leg to act as a barrier. The defender then executes a hip escape while maintaining this leg control, creating space to free the bottom leg.
Transitioning to Guard Position
As the defender completes the hip escape and turns to their back, the head position can now be elevated since the neck is no longer vulnerable to chokes. The defender uses their bottom leg for leverage to help lift and turn the opponent. Proper positioning during this transition sets up the next phase of the escape.
Butterfly Guard Setup
Once on their back beneath the opponent, the defender establishes butterfly hooks with both feet, keeping them close to the opponent's hips. The defender secures the opponent's arm to prevent it from escaping, using fingers, the gi, or a direct arm grip depending on positioning. Maintaining pressure with the butterfly hooks prevents the opponent from base-building or backing away.
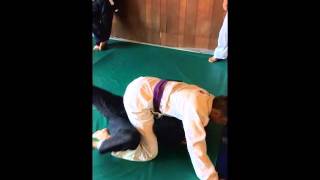
Butterfly Sweep Execution
From the butterfly guard, the defender picks a direction and turns to that side while using the bottom leg to drive upward and lift the opponent. The bottom leg provides support and lifting power while the butterfly hooks control the opponent's hips. This coordinated movement generates enough momentum to complete the sweep into mount position.
Adjusting for Arm Entrapment
If the opponent squeezes the defender's arm during the transition, the defender must work to free it by moving under the opponent's arm from one side and transitioning to the other side. Once the arm is liberated and control is re-established with butterfly hooks, the same bridge and sweep sequence can be repeated.
Drilling Versus Live Resistance
During technical drilling, the defender should move deliberately through each position without rushing when techniques don't immediately succeed. In live training with resistance, the escape may require more time and incremental adjustments to secure control of the opponent's arm. Consistent application of proper technique will enable successful escapes regardless of the opponent's response.
Escaping mount and using butterfly to sweep
Key Takeaways
- •Arm Positioning from Mount
- •Head Position and Neck Safety
- •The Bridge Setup
- •Hip Escape with Leg Defense
Basics used on this escape: - half bridge - hip escape (shrimp move) Escaping mount position and using butterfly hooks to sweep a heavier opponent. When the person doesn’t fall for the first escape from mount (upa), try connecting this variation while your hips are still off the mats (half-bridge) and use a hip escape to free your bottom leg and recompose to butterfly guard. Once in guard, trap the persons arms with a double over hook (or double under) to sweep and go to mount.
Related Techniques
Frequently Asked Questions
What does this video teach about leg pump escape?
This video covers arm positioning from mount, head position and neck safety, the bridge setup. It provides detailed instruction from Marcos Cerqueira Brazilian Jiu-Jitsu.
How long does it take to learn leg pump escape?
The basic mechanics can be understood in a single session, but developing reliable execution requires consistent drilling over weeks of practice. This 9-part breakdown helps structure your training by isolating each phase of the technique.
What are the key details for finishing leg pump escape?
If the opponent squeezes the defender's arm during the transition, the defender must work to free it by moving under the opponent's arm from one side and transitioning to the other side. Once the arm is liberated and control is re-established with butterfly hooks, the same bridge and sweep sequence can be repeated.
Related videos
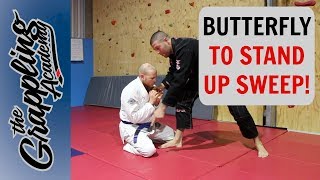
Butterfly To Stand Up Sweep!
The Grappling Academy
12b Mount Escape, Push Leg & Trap Foot
Pathfinder Jiu-Jitsu Team

Escape the Body Triangle Every Time in Jiu Jitsu | Jiu Jitsu Tutorial | Matt Arroyo
Matt Arroyo Jiu Jitsu
The Best Way To Escape From The Jiu Jitsu Body Triangle by Gordon Ryan
Bernardo Faria BJJ Fanatics
How to Escape the Body Triangle
Shawn Williams BJJ