Initial Setup and Hip Connection
The rear lift begins with the practitioner establishing a tight lock around the opponent's torso without adjusting position prematurely. The instructor steps around to block in front of the opponent's leg, creating a wrench-like mechanical advantage. Hip-to-hip connection is critical—the practitioner's hip must be firmly connected to the opponent's hip before executing the lift.
The Pop and Lift Mechanics
Once positioned perpendicular to the opponent with hips connected, the practitioner executes a pop motion using the legs to generate lifting force. The lock positioning determines which arm carries the primary load; proper lock placement allows balanced distribution rather than relying solely on one arm. The opponent should be lifted with their body parallel to the floor before being controlled to the ground.
Training Objectives and Safety Context
The instructor emphasizes this technique's potential for injury, referencing a documented incident where improper execution caused harm. Teaching the lift correctly—including proper defensive falling mechanics—is presented as essential to preventing injury. The instruction is structured to develop students' understanding of leverage and body positioning rather than raw force application.
Forward Fall Training and Mechanics
Unlike traditional wrestling breakfalls executed backward, practitioners must develop competency falling forward when lifted. The instructor demonstrates rolling into the fall on one or both knees with hand post, distributing impact rather than landing rigidly. Early training in forward falling under controlled conditions builds the body's defensive patterns.
Controlling the Descent
The opponent's body position during descent is critical—when lifted parallel to the floor, they cannot simply step down and regain balance. The practitioner must maintain control throughout the descent, applying measured force to ensure safe contact with the mat. Hand posts and distributed knee contact prevent concentrated impact that could cause injury.
Gripping and Breakdown From Standing
Before executing the lift, the practitioner must establish an elbow control position with wrist or hand grip, applying pressure to break the opponent's posture and prepare them for the move. The grip should be deep, securing either the wrist or the fleshy part of the hand for better control. This breakdown positioning prevents the opponent from resisting or jumping into the lift explosively.
Positioning and Perpendicularity
The practitioner must step completely perpendicular to the opponent's hips rather than remaining at an angle, maximizing mechanical advantage. Belly-button-to-belly-button orientation ensures the practitioner's hips drive through properly. Incomplete perpendicularity reduces leverage and requires excessive muscular effort, increasing injury risk.
Terminology and Wrestling Context
The rear lift is commonly called a mat return in wrestling terminology, though technically any move returning an opponent to the mat qualifies as a mat return. The naming convention in wrestling is less formal than in judo, with practitioners often using functional descriptors. Understanding this terminology helps when learning from different instructional sources or styles.
LIFT and Slam SAFELY!
Key Takeaways
- •Initial Setup and Hip Connection
- •The Pop and Lift Mechanics
- •Training Objectives and Safety Context
- •Forward Fall Training and Mechanics
This video I breakdown a lifting mat return we use in wrestling all the time. Check out the details and you are sure to find something useful! Enjoy! If you have any questions, comments, or suggestions, please comment below. More videos to come! Please like, share, and subscribe!! PLEASE Click this link to SUPPORT the TeachMeGrappling Channel!!! https://www.patreon.com/TeachMeGrappling or https://www.paypal.me/CoachBrianPeterson Your contribution is much appreciated and will help me continue to bring you content! 🙏 www.NextLevelGuy.com The NextLevelGuy Podcast with Coach Brian Peterson has been released!! Check it out!
Related Techniques
Frequently Asked Questions
What does this video teach about rear lift?
This video covers initial setup and hip connection, the pop and lift mechanics, training objectives and safety context. It provides detailed instruction from TeachMeGrappling Coach Brian.
How long does it take to learn rear lift?
The basic mechanics can be understood in a single session, but developing reliable execution requires consistent drilling over weeks of practice. This 8-part breakdown helps structure your training by isolating each phase of the technique.
What are the key details for finishing rear lift?
The practitioner must step completely perpendicular to the opponent's hips rather than remaining at an angle, maximizing mechanical advantage. Belly-button-to-belly-button orientation ensures the practitioner's hips drive through properly. Incomplete perpendicularity reduces leverage and requires excessive muscular effort, increasing injury risk.
Related videos

#1 Mat Return For Leg Riders
Earn Your Gold Medal
The Wrestling Video I Wish I Had Day One | Wrestling Fundamentals: Techniques for Beginners
Systematic Wrestling
Do you use this WRESTLING SETUP? IMPORTANT Wrestling Takedown Technique 🥇
Athletes Ocean
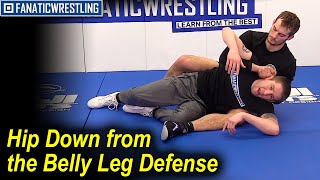
Hip Down from the Belly Leg Defense by Matt McDonough
FANATIC WRESTLING
Why 99% of Beginners Get Stuck on Bottom (And How to Escape)
Iron Faith Wrestling