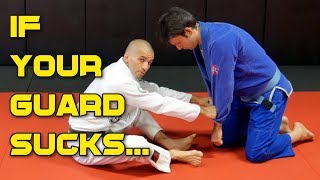
Understanding Half Guard Positioning
The fundamental distinction in half guard lies in the knee line—whichever player controls this position gains offensive leverage. When the top player's knee passes the bottom player's outside knee, they establish perpendicular pressure that locks down the position. If the bottom player can free their knee line and place it in front of the top player, offensive options immediately become available.
Common Positioning Error: Weight Distribution
A critical mistake occurs when driving off the toes while in half guard, which shifts weight forward over the knees rather than over the hips. This forward weight distribution mirrors a weak top mount position and creates an off-balancing opportunity. When the top player drives from their toes, the bottom player can capitalize by off-balancing them toward the head.
Alleviating Cross-Face Pressure
The primary method for gaining advantage involves creating separation from the cross-face by controlling the shoulder. If unable to reach the bicep, grab the deltoid and pinch the elbow to open the shoulder and regain directional control. Creating just a few inches of space allows the bottom player to face the direction needed for an effective bridge.
Stabilizing Half Guard Entry
After recovering to half guard from side control, briefly triangle the legs to slow pace and solidify the newly established position. This transitional step establishes positional security before moving to the next phase. The triangle serves as a stabilizing frame rather than an offensive tool at this stage.
Hip Positioning and Bridge Mechanics
Step the outside foot directly beside the trapped leg to maintain close connection during the bridge. Bridge over the ear rather than across the body, shrinking the hips back while leaving the shoulder forward as a frame. This shoulder positioning prevents being pushed back down while maintaining offensive structure.
Lifting and Frame Connection
Rather than pushing excessively with the knee shield, lift the opponent's hip and pull their knee to close distance. Keep the shoulder rolled forward and bring the hand in front of the forehead, using the spine to create a frame between the bodies. This positioning is both structurally stronger and creates additional control.
Hand Connection and Distance Creation
Once light tension is established with the top frame, bring the hand to the opponent's armpit without pushing outward with the palm. Connect both hands together to stretch and separate the opponent's grip. This hand connection allows the bottom player to rise to their elbow and create the necessary distance.
Transitioning from Half Guard Pressure
When the opponent pressures forward, utilize the dog fight position as the primary control point. If the opponent recognizes the position is slipping and begins to posture backward, transition immediately to closed guard to free the bottom leg. This timing-based adjustment prevents the top player from repositioning while maximizing escape opportunities.
Half Guard frame recovery details
Key Takeaways
- •Understanding Half Guard Positioning
- •Common Positioning Error: Weight Distribution
- •Alleviating Cross-Face Pressure
- •Stabilizing Half Guard Entry
Frequently Asked Questions
What does this video teach about standard half guard recovery?
This video covers understanding half guard positioning, common positioning error: weight distribution, alleviating cross-face pressure. It provides detailed instruction from The Base Jiu Jitsu.
How long does it take to learn standard half guard recovery?
The basic mechanics can be understood in a single session, but developing reliable execution requires consistent drilling over weeks of practice. This 8-part breakdown helps structure your training by isolating each phase of the technique.
What are the key details for finishing standard half guard recovery?
Once light tension is established with the top frame, bring the hand to the opponent's armpit without pushing outward with the palm. Connect both hands together to stretch and separate the opponent's grip. This hand connection allows the bottom player to rise to their elbow and create the necessary distance.
Related videos
The Easiest Guard Recovery In BJJ
MMA Leech

Guard Recovery and Inverting (Lachlan Giles)
Absolute MMA St Kilda - Melbourne

All About Jiu Jitsu Half Guard No Gi by Gordon Ryan
Bernardo Faria BJJ Fanatics

Basic Guard Recovery | Fundamental Jiu Jitsu | Performance Martial Arts Academy
Performance Martial Arts Academy
Shrimp Reguard from Side Control - Brazilian Jiu-Jitsu for Kids
Utopia Martial Arts