Understanding Reverse Kesa Gatame Structure
Reverse Kesa Gatame relies on the top player's approach and positioning across the defender's upper body. The top player can transition through various attacks including arm control, hip manipulation, and positional switches to north-south or dart stroke positions. Success depends on the top player controlling the armpit space and preventing the defender from maintaining shoulder safety.
The Critical Armpit Space Battle
The primary objective for the top player is to establish and maintain control of the armpit space, which is the gateway to submissions and position dominance. If the defender successfully protects the armpit space, they can survive attacks such as arm locks, side control switches, and transitions. Losing the armpit space forces the defender into an increasingly desperate position with minimal options.
Two Defensive Strategies Compared
The defender has two options when the top player drives upward into the armpit space: direct opposition by pushing the opponent backward, or yielding and filling the space with the elbow placed on the mat. The second method proves more efficient, requiring less energy expenditure while maintaining position security and preventing shoulder damage accumulation.
Survival Through Elbow Positioning
Proper elbow placement on the mat is the foundation of survival in Reverse Kesa Gatame, creating a structural framework that channels the opponent's pressure safely to the ground. The defender maintains connection through a kinetic chain: energy flows from opponent pressure through elbow to shoulder to head and into the mat. This connected structure prevents the top player from creating advantageous gaps while keeping the defender relaxed and secure.
The Escape Sequence: Initial Setup
The escape begins by executing a slight directional shift toward the opponent while lifting the lower hip, followed by pointing the knees toward the top player and drawing the heel toward the buttock. This preparatory movement must be precise and minimal; excessive movement or incorrect positioning compromises the entire escape sequence. The defender maintains eye contact with the opponent throughout this transition.
Hip Escape Execution and Knee Insertion
Once properly positioned, the defender performs a controlled hip escape laterally—not toward neutral space but directly sideways away from the top player. Immediately after creating separation, the defender inserts the knee into the gap created between their body and the opponent's chest. This knee placement reclaims the critical space that defines successful escape from the position.
Frame Replacement and Ascension to Palm Position
After inserting the knee, the defender replaces their initial framing arm with the second arm using a pushing frame or belt grip, creating a stable barrier against pursuit. The defender then transitions from supporting on the forearm to pressing onto the palm, gaining sufficient height to maintain positional advantage. This height differential prevents the top player from re-establishing control even if they attempt to chase the defender's escape.
Final Position Achievement
Upon successful completion of the escape sequence, the defender achieves a position where they control the engagement distance while maintaining defensive integrity. The defender can then advance their position or establish back control depending on the top player's reaction. Throughout the entire sequence, smooth, connected movement and proper timing are essential for consistent success.
Escaping Reverse Kesa Gatame (Reverse Judo Control) | Jiu-Jitsu Class (Part 1)
Key Takeaways
- •Understanding Reverse Kesa Gatame Structure
- •The Critical Armpit Space Battle
- •Two Defensive Strategies Compared
- •Survival Through Elbow Positioning
In this comprehensive Jiu-Jitsu tutorial, 00:08 Understanding the Threats 04:26 Survival Tips 06:00 Escape Join us for Part 1 of our series on Escaping Reverse Kesa Gatame, also known as Reverse Judo Control. Explore effective techniques and strategies to break free from this challenging hold, enhancing your ground game skills. Whether you're a novice or a seasoned practitioner, this instructional video is designed to help you improve your Jiu-Jitsu prowess. Stay tuned for more valuable insights in future parts of this series as we delve deeper into mastering the art of escape and control in Jiu-Jitsu. Subscribe and hit the notification bell to stay updated with our latest Jiu-Jitsu classes and tutorials. To know more follow us on : Instagram : https://instagram.com/binishsukhija?igshid=YmM0MjE2YWMzOA== https://instagram.com/knotsandcollar?utm_medium=copy_link Google Location : https://goo.gl/maps/sLWYbodvUheR8vVPA Website : https://knotsandcollar.com Email : [email protected] Book a free trial session now call us at +91 9999255205 / 9717956687 **Safety Advisory: Please Practice Movements Shown at Your Own Discretion** Your safety is of utmost importance to us, and we want to ensure that you have a positive and secure experience while watching and attempting the movements demonstrated in this video. Here are some essential safety guidelines: 1. **Consult a Professional**: Before attempting any self-defense or physical movements shown in this video, it's advisable to consult with a qualified instructor or healthcare professional, especially if you have any pre-existing medical conditions or injuries. 2. **Start Slowly**: If you're new to these techniques or not fully confident, start slowly and gradually increase the intensity as you become more comfortable. Rushing into complex movements can increase the risk of injury. 3. **Use Proper Form**: Pay close attention to the instructor's guidance on correct form and technique. Proper form is essential for both effectiveness and safety. 4. **Practice in a Safe Environment**: Ensure you have enough space to practice safely, away from any obstacles or hazards. Practicing on a soft surface, such as a mat or carpet, can help reduce the risk of injury in case of accidental falls. 5. **Listen to Your Body**: If you experience pain, discomfort, or any unusual sensations while practicing these movements, stop immediately and seek professional advice if needed. 6. **Stay Hydrated**: Hydration is key during physical activities. Drink water before, during, and after your practice session to prevent dehydration. 7. **Know Your Limits**: Everyone's physical abilities vary. Don't push yourself beyond your limits, and don't feel pressured to perform advanced movements if you're not ready. 8. **Use a Partner**: If possible, practice these techniques with a training partner. Having a partner can enhance the learning experience and provide an extra layer of safety. 9. **Respect Personal Boundaries**: When practicing with a partner, ensure you both agree on the level of force and contact involved in the training to prevent accidental injuries. 10. **Seek Professional Training**: While this video can be a valuable resource, nothing replaces professional training. Consider enrolling in a self-defense or martial arts class to receive hands-on instruction. Remember, the movements demonstrated in this video are intended for educational purposes, and your safety is your responsibility. Please use caution, exercise common sense, and practice these techniques responsibly.
Related Techniques
Frequently Asked Questions
What does this video teach about reverse kesa gatame?
This video covers understanding reverse kesa gatame structure, the critical armpit space battle, two defensive strategies compared. It provides detailed instruction from Knots and Collar.
How long does it take to learn reverse kesa gatame?
The basic mechanics can be understood in a single session, but developing reliable execution requires consistent drilling over weeks of practice. This 8-part breakdown helps structure your training by isolating each phase of the technique.
What are the key details for finishing reverse kesa gatame?
After inserting the knee, the defender replaces their initial framing arm with the second arm using a pushing frame or belt grip, creating a stable barrier against pursuit. The defender then transitions from supporting on the forearm to pressing onto the palm, gaining sufficient height to maintain positional advantage. This height differential prevents the top player from re-establishing control even if they attempt to chase the defender's escape.
Related videos
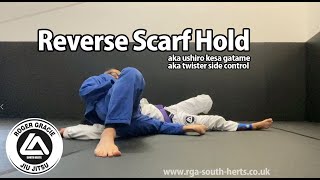
Reverse Scarf Hold - aka twister side control or ushiro kesa gatame
RGA South Herts

Kesa Gatame Submissions - How to get into kesa gatame and 10 different submissions - BJJ tutorials
Grappling Nerds
Kesa gatame - in depth instruction by Matt D’Aquino
BeyondGrappling
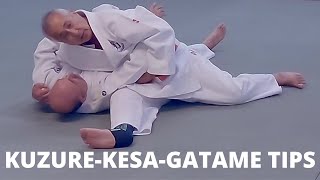
Kuzure-Kesa-Gatame Tips | Riki Judo Dojo
Riki Judo Dojo
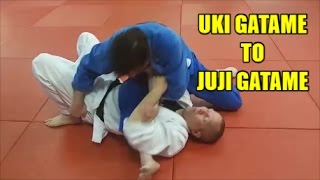
UKI GATAME TO JUJI GATAME
welcomematstevescott