Inside-to-Outside Strike Fundamentals
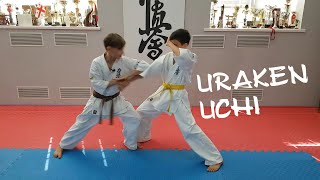
The shuto (knife hand) strike executes from inside to outside, targeting the opponent's lateral neck. The technique requires speed and control to avoid causing serious injury. One hand remains positioned while the other delivers the striking motion across the body.
Bilateral Neck Strike with Hip Integration
Sayo strikes target both sides of the opponent's neck at the midline. Practitioners cross their hands before executing the strike while simultaneously generating power from hip rotation. This coordinated body mechanics maximizes force delivery while maintaining defensive positioning.
Shoulder Height and Circular Chamber
Proper shoulder alignment is critical for effective technique execution. The hands chamber behind the head in a circular motion before extending forward into the strike. This circular path generates rotational power while maintaining proper distance and angle.
Overhead Chamber to Strike Pattern
The striking sequence begins with hands positioned at the back of the head. Practitioners elevate their hands upward before driving them downward and forward into the strike. This vertical chambering creates momentum and generates power through the entire kinetic chain.
Collarbone Strike with Stance Integration
The collarbone (sakotsu) presents an alternative target requiring straight-line hand positioning. Proper stance foundation enables the practitioner to drive straight through the target. The technique demands precise body alignment and deliberate hand mechanics for maximum effectiveness.
Spinal and Lever Area Targeting
Advanced applications target the spine and surrounding lever points along the posterior body. The circular hand chamber executes from behind the head, positioning for optimal contact angles. Speed and precision replace power, allowing controlled application suitable for training environments.
SHUTO TECHNIQUE
Key Takeaways
- •Inside-to-Outside Strike Fundamentals
- •Bilateral Neck Strike with Hip Integration
- •Shoulder Height and Circular Chamber
- •Overhead Chamber to Strike Pattern
1. SHUTO UCHI UCHI 2. SHUTO SAYU UCHI 3. SHUTO GANMEN UCHI 4. SHUTO SAKOTSU UCHI 5.SHUTO SAKOTSU UCHI KOMI 6. SHUTO HIZO UCHI
Related Techniques
Frequently Asked Questions
What does this video teach about shuto sakotsu uchikomi?
This video covers inside-to-outside strike fundamentals, bilateral neck strike with hip integration, shoulder height and circular chamber. It provides detailed instruction from Debasis Bhar Karate Academy.
How long does it take to learn shuto sakotsu uchikomi?
The basic mechanics can be understood in a single session, but developing reliable execution requires consistent drilling over weeks of practice. This 6-part breakdown helps structure your training by isolating each phase of the technique.
What are the key details for finishing shuto sakotsu uchikomi?
The collarbone (sakotsu) presents an alternative target requiring straight-line hand positioning. Proper stance foundation enables the practitioner to drive straight through the target. The technique demands precise body alignment and deliberate hand mechanics for maximum effectiveness.