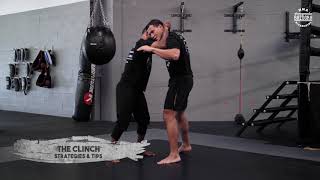
Foundation: The Pummeling Concept
Pummeling is continuous arm movement designed to secure underhook positioning in the clinch. The drill begins with both participants in a neutral position where each maintains one underhook, creating a 50/50 advantage scenario. Resistance should be applied without excessive tension, allowing fluid movement patterns to develop.
Critical Control Points: Elbow Pinching and Head Placement
When securing an underhook, the controlling arm's elbow must remain pinched against the opponent's underhooking arm to prevent escape. Simultaneously, the head must position directly over the shoulder of the arm executing the underhook—deviating from this alignment eliminates pressure and allows the opponent to generate upward pressure. These two points work in tandem to neutralize the opponent's leverage.
The Pummeling Sequence: Space, Swim, and Switch
Proper pummeling requires three synchronized actions: creating separation, swimming the free arm inside to establish the new underhook, and adjusting head position accordingly. The controlling elbow must remain pinched throughout the transition; flaring the elbow open invites the opponent to punch over and escape. Each repetition reinforces the positional sequence until it becomes reflexive.
Footwork Integration and Leg Placement
As proficiency develops, foot positioning should adjust to match the clinch dynamics. The leg on the opponent's underhook side should remain slightly back, preventing easy access to leg-grab takedown attempts. While beginners maintain a square stance, advanced practitioners synchronize foot movement with each pummeling transition to optimize defensive positioning.
Head Position: Distance and Safety
Maintaining proper head proximity is essential for both control and protection. Excessive distance allows the opponent to land clubbing strikes to the back of the head or attempt snapping movements. The head should remain close and transition smoothly with each underhook switch, preventing the opponent from exploiting gaps in defense.
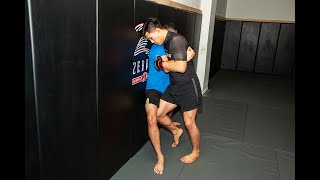
Neutralizing Double Underhook Advantage
When the opponent secures both underhooks without adequate response, the practitioner loses positioning advantage and assumes a defensive posture. The immediate priority is to "kill" the opponent's underhook by applying concentrated weight and pressure through elbow pinching while simultaneously posting with the hand to create separation and defensive angles.
The Kill-Post-Head Position Sequence
When unable to secure reciprocal underhooks, execute a three-part defensive sequence: kill the opponent's underhook with elbow pressure, post the free hand on the chest or thigh for structural support, and position the head to block level changes and underhook escape attempts. Taller practitioners must drive the forehead into the opponent's jawline to achieve the same defensive effect.
Application: The McGregor-Cerrone Model
McGregor's dominant clinch performance against Cerrone exemplified proper underhook killing technique combined with positional advantage. After neutralizing Cerrone's underhook and establishing post control, McGregor maneuvered into a T-shaped angle that isolated Cerrone's body while preventing counteroffense, creating the opening for relentless shoulder strikes until separation occurred.
How Did Conor McGregor Beat Cerrone In The Clinch? Learn How To Pummel And Kill Underhooks!
Key Takeaways
- •Foundation: The Pummeling Concept
- •Critical Control Points: Elbow Pinching and Head Placement
- •The Pummeling Sequence: Space, Swim, and Switch
- •Footwork Integration and Leg Placement
Frequently Asked Questions
What does this video teach about standard underhook cage clinch?
This video covers foundation: the pummeling concept, critical control points: elbow pinching and head placement, the pummeling sequence: space, swim, and switch. It provides detailed instruction from Mick Hall.
How long does it take to learn standard underhook cage clinch?
The basic mechanics can be understood in a single session, but developing reliable execution requires consistent drilling over weeks of practice. This 8-part breakdown helps structure your training by isolating each phase of the technique.
What are the key details for finishing standard underhook cage clinch?
When unable to secure reciprocal underhooks, execute a three-part defensive sequence: kill the opponent's underhook with elbow pressure, post the free hand on the chest or thigh for structural support, and position the head to block level changes and underhook escape attempts. Taller practitioners must drive the forehead into the opponent's jawline to achieve the same defensive effect.
Related videos
The Clinch - Episode #68
Bazooka Joe Valtellini

How to Break from the Clinch | MMA Cage Wrestling
Danny Mitchell MMA
MMA Cage Wall Training - Dominating Strikes from the Clinch with Rene Dreifuss
Stuart Tomlinson

Tips on Finishing a Double Leg Takedown
NY Martial Arts Academy

MMA Using the Cage Wall Tutorial
Stuart Tomlinson